This part walks steps 3 to 9 in order, with a troubleshooting table at the end. The <PLACEHOLDER> values in commands and screenshots are explained in Part 1's placeholder table; the prerequisites (VPS, Cloudflare zone, ChatGPT plan, Developer mode) are in Part 1, section 2.
The images are real screenshots from a running instance. Screenshots and menu paths reflect the ChatGPT, Cloudflare, and GitHub interfaces as of September 16, 2026; these change often, so if a button is not where the guide says, search by the section name. Every identifying value is blurred and maps to a placeholder in Part 1. Commands and variable names were rechecked against Duy Nguyen's (@mrgoonie) bestagentkits/cloud-harness-mcp repo at v0.79.1 on October 29, 2026.
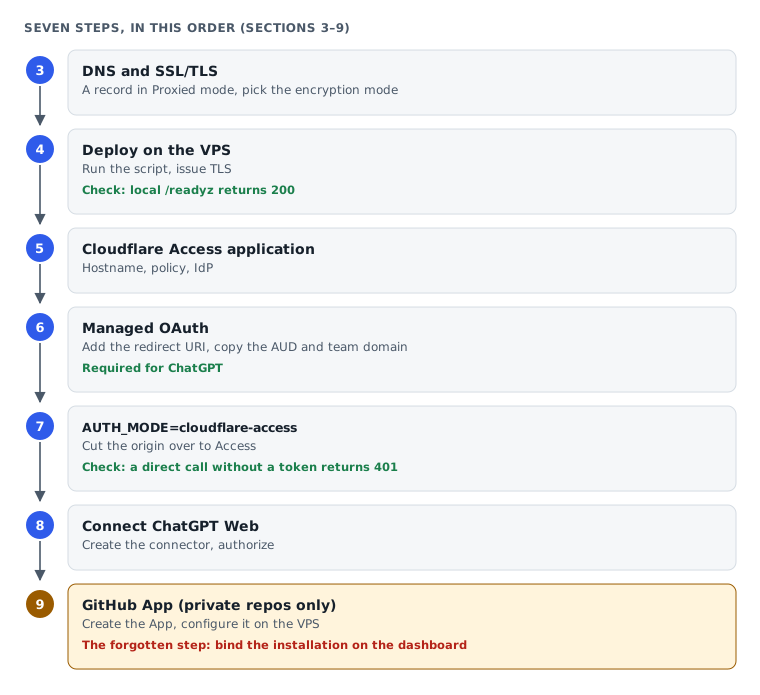
3. DNS and SSL/TLS
Point the hostname at the VPS through the Cloudflare proxy, then choose the encryption mode.
Traffic to https://<MCP_HOST> must go Proxied through Cloudflare so Access can intercept and authenticate before the origin. Proxied (orange) means CF → Access → origin, which is correct for Managed OAuth; DNS only (grey) goes straight to the VPS and ChatGPT OAuth usually breaks.
Path: https://dash.cloudflare.com/ → zone <ROOT_DOMAIN> → DNS → Records → Add record
- Type
A, Name<MCP_SUBDOMAIN>, Content<VPS_PUBLIC_IP>, Proxy Proxied.
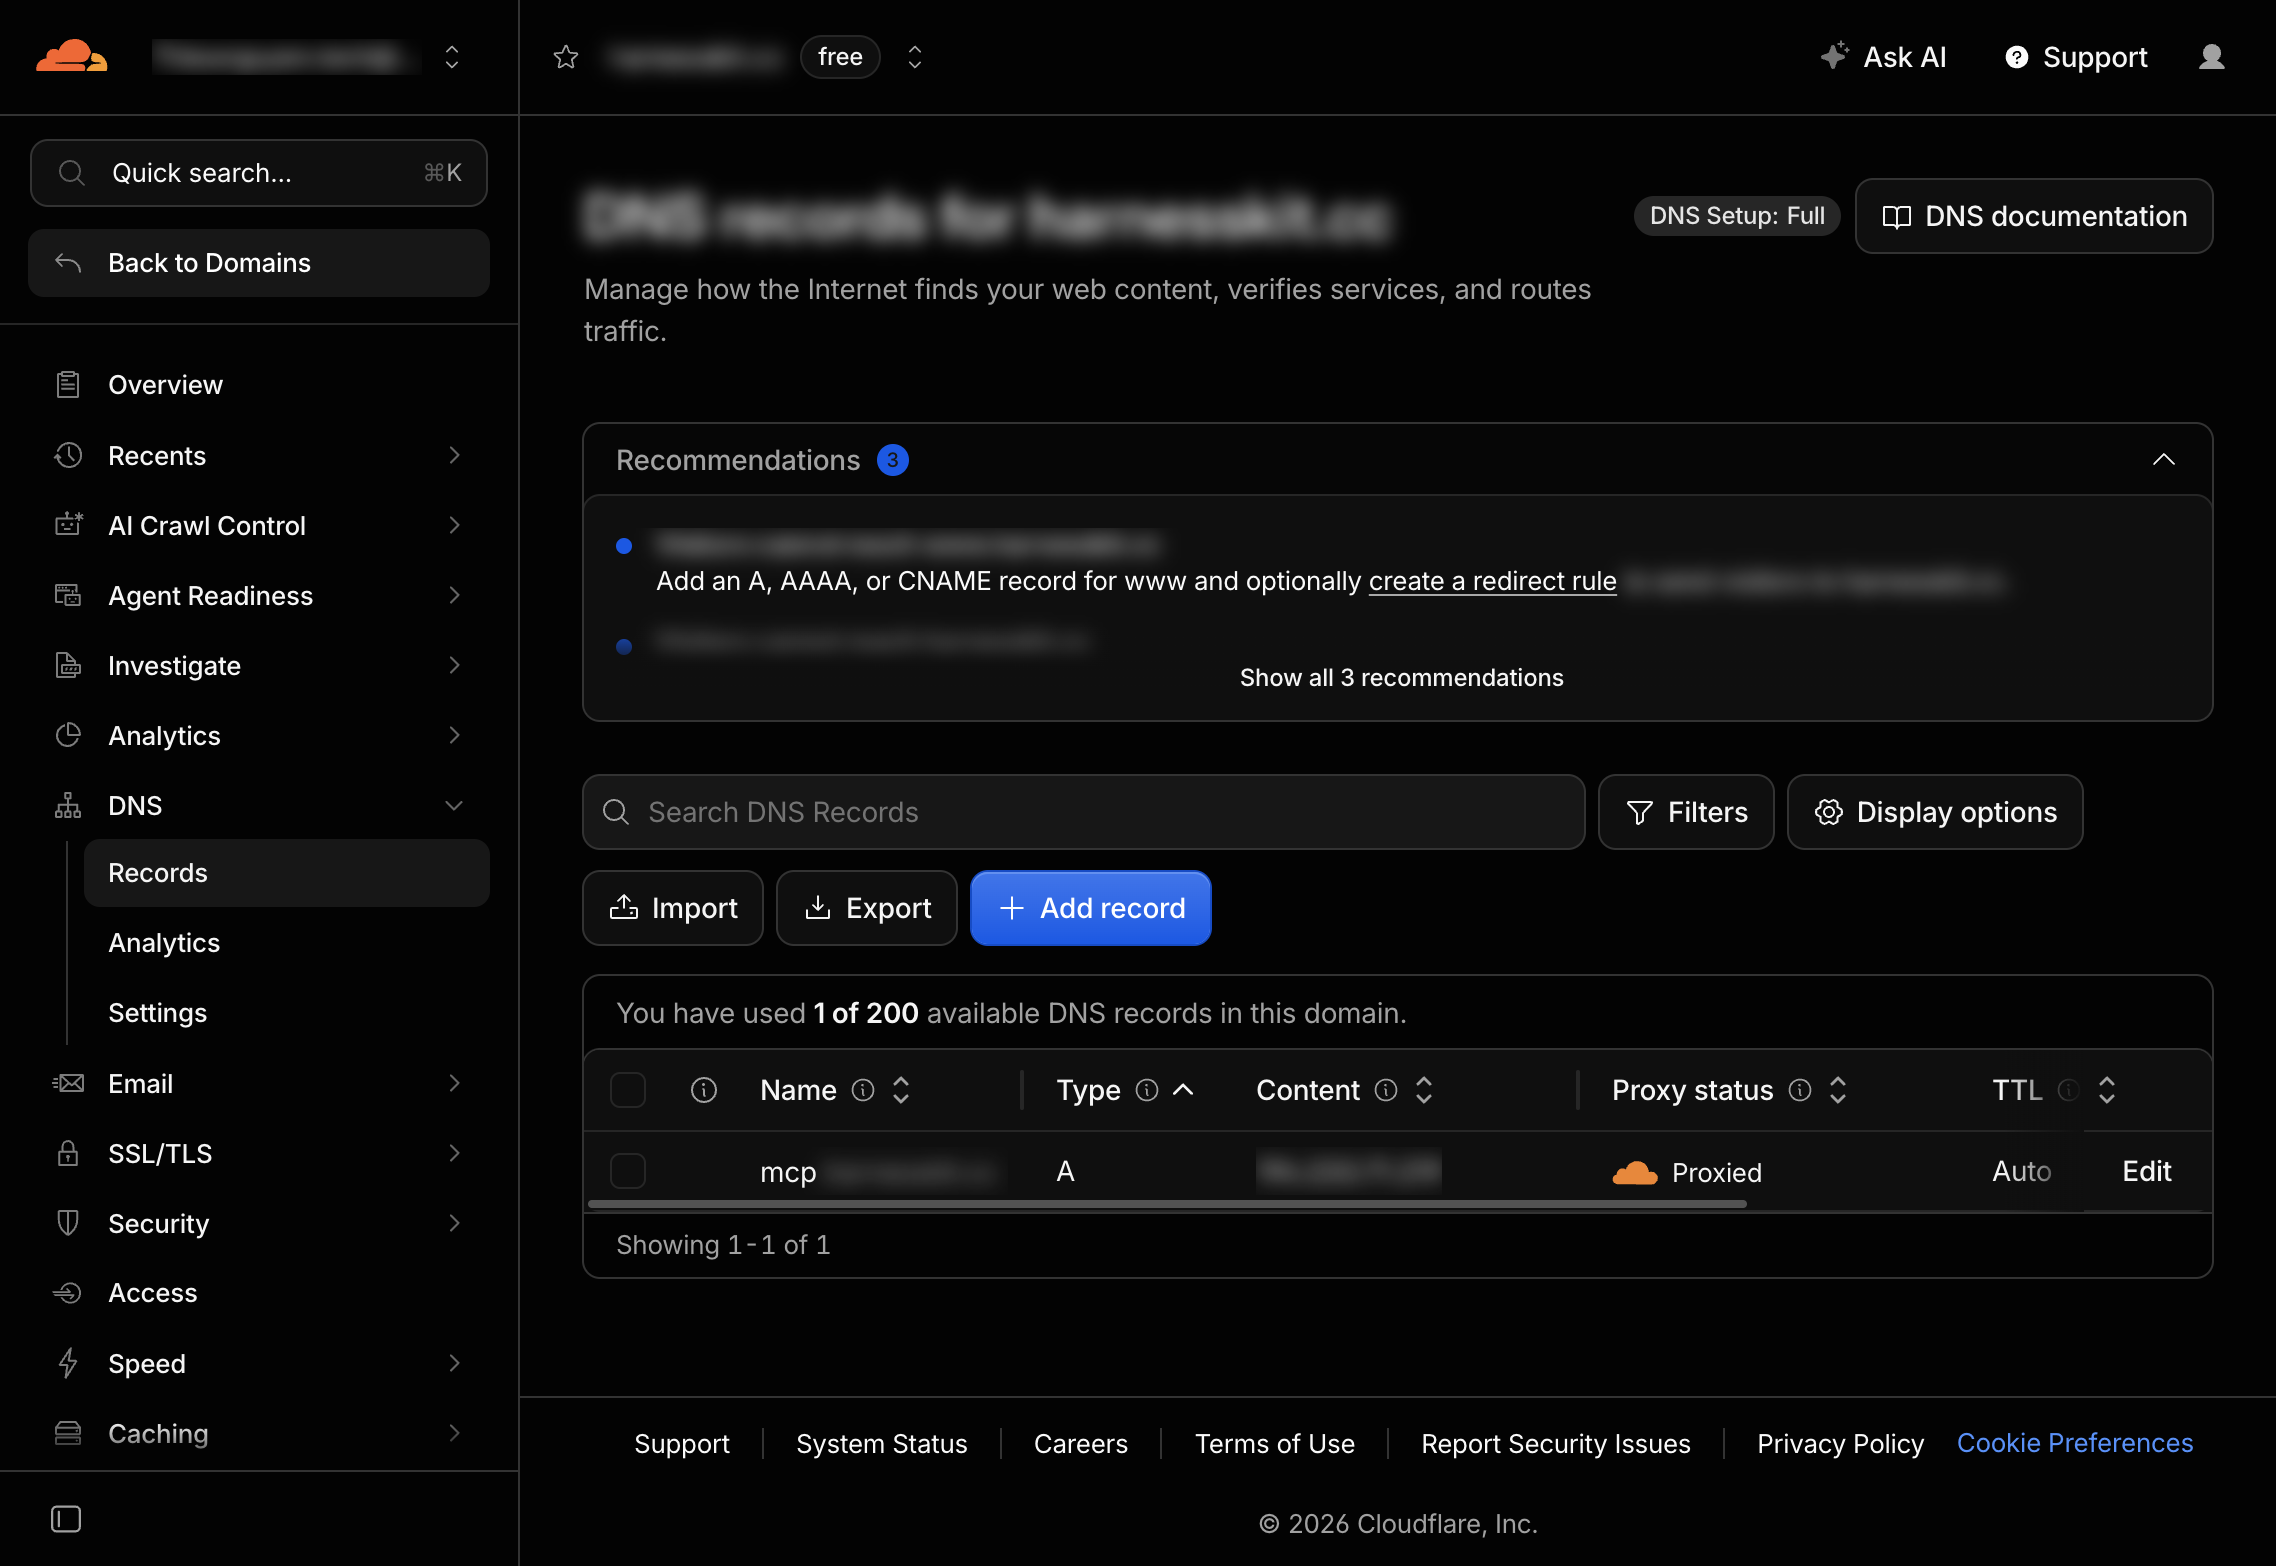
In the screenshot: record mcp, Type A, Content (IP) blurred, Proxy status: Proxied, TTL Auto.
Choose the SSL/TLS encryption mode
Path: zone → SSL/TLS → Overview (.../ssl-tls/configuration) → Configure encryption mode.
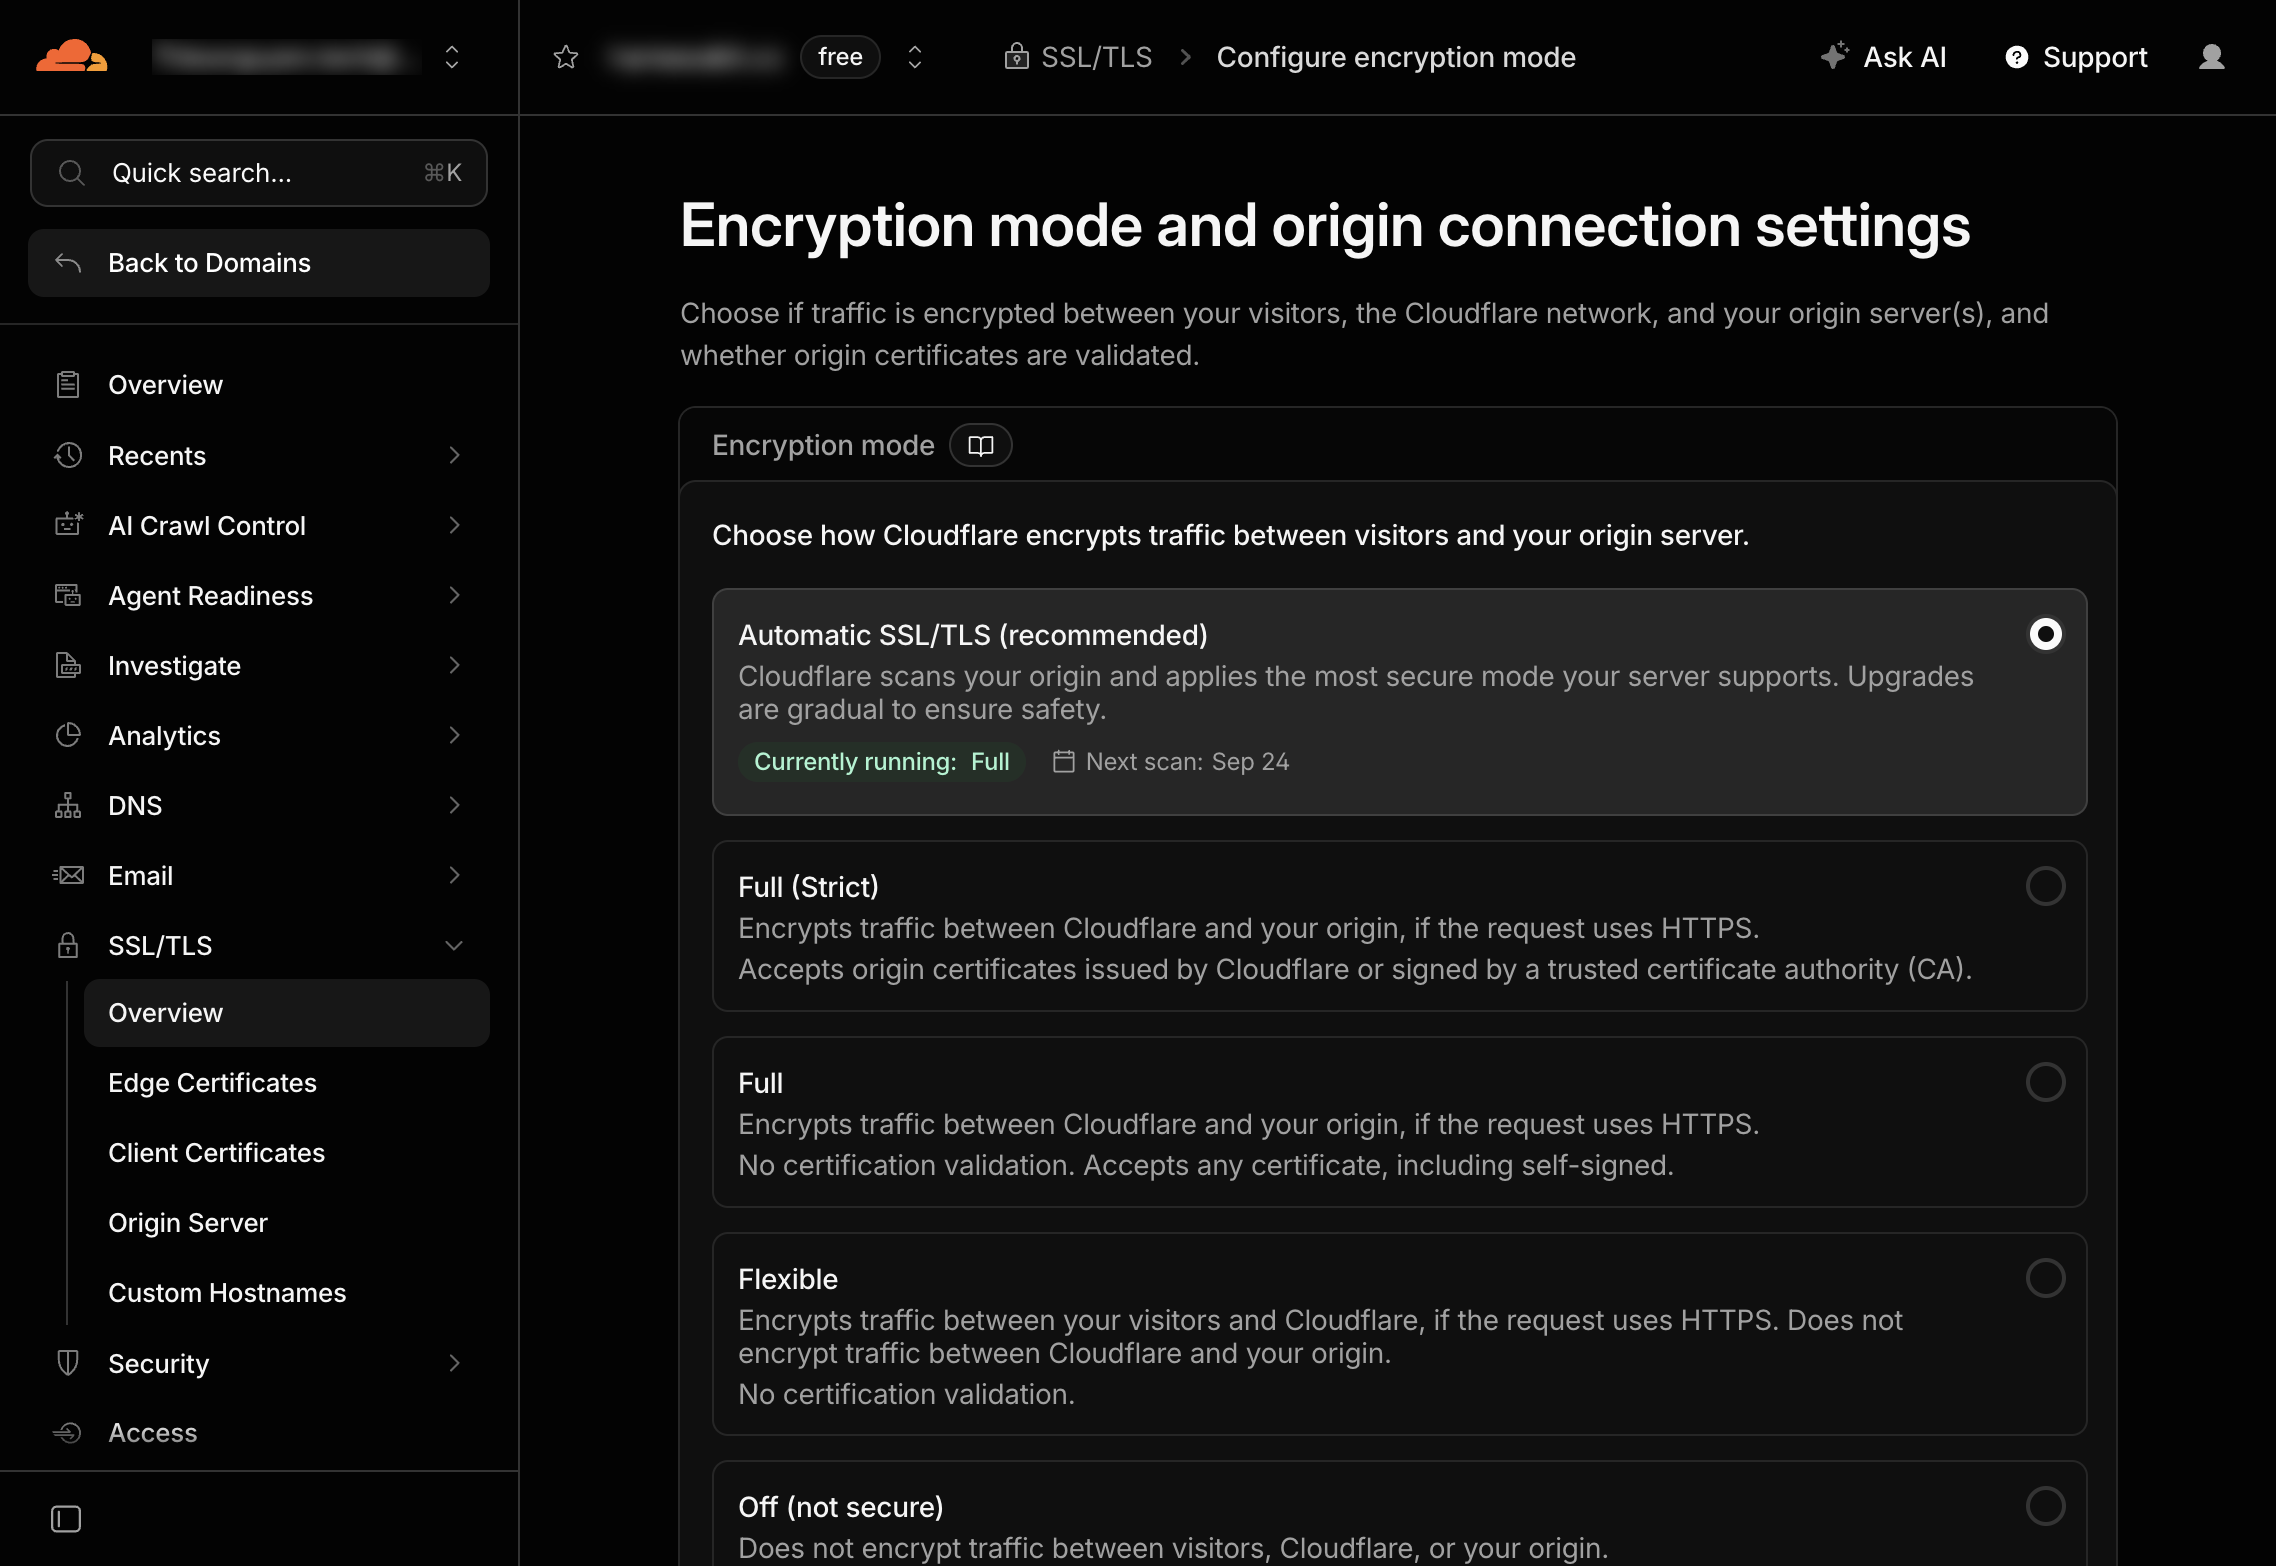
Cloudflare defaults to suggesting Automatic SSL/TLS (recommended), and the effective mode may then be Full, which does not validate the origin certificate.
Choose Full (strict) if you want it tightened: this mode requires the origin to hold a valid certificate from a trusted CA or signed by Cloudflare, and rejects self-signed certs.
| Mode | Validates the origin cert? | Note |
|---|---|---|
| Automatic SSL/TLS | Cloudflare decides | May drop to Full |
| Full (strict) | Yes | Recommended |
| Full | No | Accepts self-signed certs |
| Flexible | No (and no encryption from Cloudflare to origin) | Avoid |
Opens when your account has subscriber access
This guide is for subscribers
Once your account has access, the full piece, the interactive visual and the agent call all open.
- Sign in or create a modernEngineer accountReading access belongs to your account email.
- Choose a plan on the pricing page1, 3 or 12 months, paid by VietQR bank transfer. Access opens about a minute after the money arrives.
- Or redeem a Facebook subscriber codePeople supporting the page on Facebook get an activation code by message each month.
Already a subscriber? Sign in to read.
Use this piece in your agent
Get an API keyCopy the text below and paste it into Claude Code, Codex or whichever agent you use. The agent reads the piece and checks it against the repo you have open.
Read "Self-hosting Cloud Harness MCP for ChatGPT (2/3): Deploy, Cloudflare Access and the ChatGPT connector" on modernEngineer and apply it to this repo.
1. Call the content_get tool of the modernengineer MCP server with locale "en", slug "cloud-harness-mcp-chatgpt-setup-2-deploy". If the modernengineer MCP server is not connected, stop and walk me through connecting it from https://modernengineer.dev/en/mcp.
2. Summarize the main steps of the piece and point out which apply to this repo.
3. Propose concrete changes and ask me before editing any file.
Connect MCP in Claude Code (once)
claude mcp add --transport http modernengineer \
  https://api.modernengineer.dev/mcp \
--header "Authorization: Bearer <API key>"Reading the full piece over MCP needs an API key from a subscriber account or one that bought this guide. Without access, the agent only gets the opening.
- Version
- v1.0.0
- Updated
- 16/09/2026
- Licence
- Subscriber-only; redistribution prohibited
- Slug
- cloud-harness-mcp-chatgpt-setup-2-deploy